


When I was a kid we had an unofficial Sunday afternoon tradition - every week, after church, my family would sit back from a big Sunday dinner and want dessert. Usually something chocolate, always something quick, and we were almost always out of some key ingredient, like eggs. This is the sort of recipe that would have been perfect for a hot summer Sunday.
It is made without eggs and without milk, it's gluten-free, could easily be adjusted to be nut-free, it's soy-free and has no added sugar and it still tastes amazing. It's just a few ingredients that you probably already have in your pantry and if you don't happen to keep chickpeas in you pantry now is a good time to start. You can make all kind of good things with them other than hummus, like mock egg salad sandwiches (that is a recipe for another day) and the can I bought to make this was just 99 cents. So whatever your dietary restrictions are in your house, or even if there are none, this is a great recipe to have in your back pocket for when you want something sweet. Plus this requires zero time at the stove, which is a plus when you want something sweet but don't want to stand at the stove.
Since we switched to a vegan diet there have been a few things that I have missed, tasty desserts have been one. It's just taken me awhile to find recipes that I enjoy that are dairy-free (specifically butter-free) and egg-free. This is one of the best recipes that I have tried so far. It's a simplification of a couple different recipes that I found online and smashed together. I didn't think I'd ever have a tasty pudding again - I was wrong.
By the way - I would have liked to have been able to take better pictures for this post - but I made it late at night after the baby finally went to sleep and didn't have everything I needed to make a light box (because I keep giving all of my poster boards to my kids for their school projects!!) so it is what it is.
Ingredients
1 can chickpeas (aka garbanzo beans)
1/4 tsp cream of tartar
1 tsp vanilla
1 cup chocolate chips
2 Tb peanut butter
I think that if you didn't have any chocolate chips on hand (oh the horror) you could substitute 2 Tb cocoa powder and 1/4 cup powdered sugar. Add it to the aquafaba after it has fluffed.
The first thing you'll want to do is put your can of chickpeas in the fridge and your bowl and whisk for your stand mixer in the freezer. I usually have a few dishes to wash, counters to clean up etc. before I'm ready to start so I did that for maybe 15-20 minutes while everything was chilling. I felt like the more chilled everything was the better foam it formed.
Drain the chickpeas and SAVE THE WATER!! You'll be making something called aquafaba with the water from the chickpeas.

 Drain the chickpeas. Set aside the chickpeas for some other use. Save the chickpea water aka aquafaba. You'll have somewhere around 1/2 cup to 3/4 cup.


 These are the chocolate chips that I used for this recipe. They are available at my grocery store in the natural foods isle. They are allergy friendly (vegan!) chocolate chips. Whatever you typically use or have on hand should work just as well.
By the way - I would have liked to have been able to take better pictures for this post - but I made it late at night after the baby finally went to sleep and didn't have everything I needed to make a light box (because I keep giving all of my poster boards to my kids for their school projects!!) so it is what it is.
Ingredients
1 can chickpeas (aka garbanzo beans)
1/4 tsp cream of tartar
1 tsp vanilla
1 cup chocolate chips
2 Tb peanut butter
I think that if you didn't have any chocolate chips on hand (oh the horror) you could substitute 2 Tb cocoa powder and 1/4 cup powdered sugar. Add it to the aquafaba after it has fluffed.
The first thing you'll want to do is put your can of chickpeas in the fridge and your bowl and whisk for your stand mixer in the freezer. I usually have a few dishes to wash, counters to clean up etc. before I'm ready to start so I did that for maybe 15-20 minutes while everything was chilling. I felt like the more chilled everything was the better foam it formed.
Drain the chickpeas and SAVE THE WATER!! You'll be making something called aquafaba with the water from the chickpeas.
In the picture you can see my method for draining the chickpeas: with my hand crank can opener I made a medium sized slit on one side of the can and a small air hole on the other side of the can. This works really well for me. I just stick the can back in the fridge once the chickpeas have drained and use the chickpeas the next day.
Take your bowl out of the freezer.


Add the aquafaba, 1/4 tsp cream of tartar, & 1 tsp vanilla. Blend in your stand mixer on high.
(If you are using unsweetened or semi-sweet chocolate chips you can add some powdered sugar here. I'd suggest you add 1/2 cup for unsweetened chocolate and 1/4 cup for semi-sweet.)
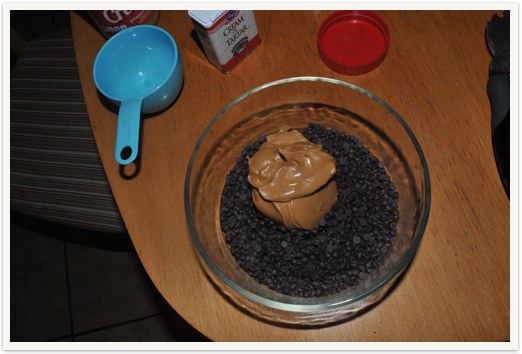

Zap your chocolate chips and peanut butter in the microwave for about a minute. I suggest doing this for just 30 seconds at a time, you really do not want to overcook this. You'll take it our once the chocolate starts to get shiny but isn't melted all of the way. The heat in the peanut butter will cause the chocolate chips to finish melting.


I wanted you to see how scary and gross it looks during the mixing phase.

Just keep going, it'll be worth it once it's done.

Almost there!

Done.

Hat tap: this recipe was inspired by this recipe by Chocolate Covered Katie and this recipe on bite.com


